2022. 2. 13. 20:24ㆍSpring
oauth2의 인증 진행 과정은 다음과 같다

1. gradle dependency 설정
dependencies {
    implementation 'org.springframework.boot:spring-boot-starter'
    implementation 'org.springframework.boot:spring-boot-starter-web-services'
    implementation 'org.springframework.boot:spring-boot-starter-data-jpa'
    implementation 'org.springframework.boot:spring-boot-starter-oauth2-client:2.4.2'
    implementation 'mysql:mysql-connector-java'
    implementation 'org.projectlombok:lombok:1.18.22'

    testImplementation 'org.springframework.boot:spring-boot-starter-test'
}
spring-boot-starter-oauth2-client 라이브러리에 oauth2 로그인을 통한 인증과 권한 처리에 관한 api가 들어있다.
2. github oauth application 생성
https://github.com/settings/developers
GitHub: Where the world builds software
GitHub is where over 73 million developers shape the future of software, together. Contribute to the open source community, manage your Git repositories, review code like a pro, track bugs and feat...
github.com

Homepage URL은 나의 어플리케이션 홈페이지 url을,
Authorization callback URL은 로그인 후 호출되는 페이지 URL을 입력한다.
나는 둘 다 http://localhost:8000 을 입력했다.
3. applicaiton.yml 설정
spring:
  datasource:
    driver-class-name: com.mysql.cj.jdbc.Driver
    url: jdbc:mysql://localhost:3306/test?serverTimezone=Asia/Seoul
    username: root
    password: 1234
  security:
    oauth2:
      client:
        registration:
          github:
            clientId: 1q2w3e4r5t6y7u8i
            clientSecret: qawsedrftgyhujik
CilentID와 CliendSecret는 방금 생성한 github oauth application에 들어가면 확인할 수 있다.
4. RestController 생성
package com.example.jwtoauthtutorial.api;
import org.springframework.security.core.annotation.AuthenticationPrincipal;
import org.springframework.security.oauth2.core.user.OAuth2User;
import org.springframework.web.bind.annotation.GetMapping;
import org.springframework.web.bind.annotation.RestController;
import java.util.Collections;
import java.util.Map;
@RestController
public class SocialController {
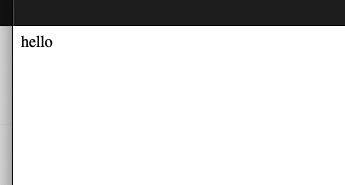
@GetMapping("")
public String hello() {
return "hello";
}
@GetMapping("/user")
public Map<String, Object> user(@AuthenticationPrincipal OAuth2User principal) {
return Collections.singletonMap("user", principal);
}
@GetMapping("/user/name")
public Map<String, Object> userName(@AuthenticationPrincipal OAuth2User principal) {
return Collections.singletonMap("user", principal.getAttribute("name"));
}
}5. WebSecurityConfigure 설정
package com.example.jwtoauthtutorial.config;

import org.springframework.http.HttpStatus;
import org.springframework.security.config.annotation.web.builders.HttpSecurity;
import org.springframework.security.config.annotation.web.configuration.WebSecurityConfigurerAdapter;
import org.springframework.security.web.authentication.HttpStatusEntryPoint;
import org.springframework.security.web.csrf.CookieCsrfTokenRepository;

public class WebSecurityConfig extends WebSecurityConfigurerAdapter {

    @Override
    protected void configure(HttpSecurity http) throws Exception {
        http.authorizeHttpRequests(a -> a.antMatchers("/", "/error")
                        .permitAll()
                        .anyRequest().authenticated()
                )
                .exceptionHandling(e -> e.authenticationEntryPoint(new HttpStatusEntryPoint(HttpStatus.UNAUTHORIZED)))
                .oauth2Login()

                .and()
                .logout(l -> l.logoutSuccessUrl("/").permitAll())

                .csrf(c -> c.csrfTokenRepository(CookieCsrfTokenRepository.withHttpOnlyFalse()));

    }
}
WebSecurityConfigurerAdapter
WebSecurityConfigurer의 인스턴스를 편리하게 제공하는 클래스
WebSecurityConfigurer는 WebSecurity클래스를 커스터마이징이 가능하게 하는 인터페이스이다.
authorizeHttpRequests()
HttpServletRequest의 제한된 접근을 허가한다.
antMatchers를 통해 "/" 와 "/error" 에 대한 api 접근은 허가한다.
permitAll()
어떠한 보안 요구 없이 요청을 허용해준다.
anyRequest().authenticated()
(위에서 지정한 요청을 제외하고 "/", "/error")어떤 요청이든 인증된 자만 접근이 가능하다.
exceptionHandling()
예회 발생시 핸들링 처리
oauth2Login()
oauth2 혹은 openID를 통한 인증 지원을 구성한다.
logout()
로그아웃 실행 시 진행
logoutSuccessUrl()
로그아웃 성공 시 이동할 경로를 지정
csrf()
CSRF공격에 대한 보호를 가능하게 한다
CSRF란?
사이트 간 요청 위조(Cross-Site Request Forgery)
웹 어플리케이션 취약점 중 하나로 사용자가 자신의 의지와 무관하게 공격자가 의도한 행동을 하여 특정 웹페이지를 보안에 취약하게 한다거나 수정, 삭제 등의 작업을 하게 만드는 공격방법
6. 테스트
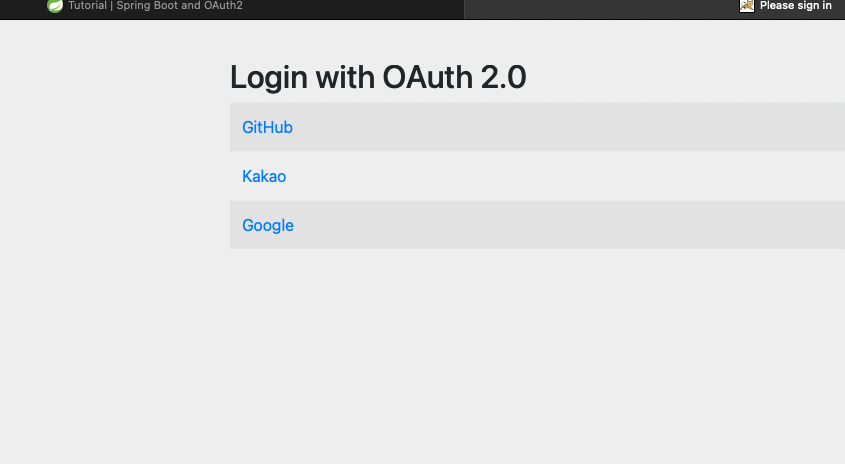
localhost:8080/login으로 접속해보자
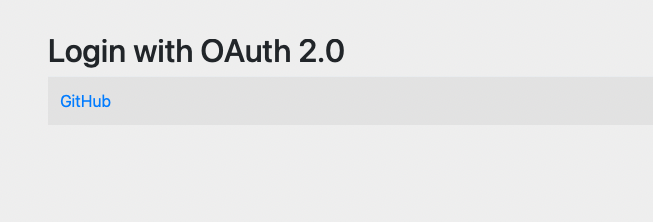
이런 창이 나타날 것이다.
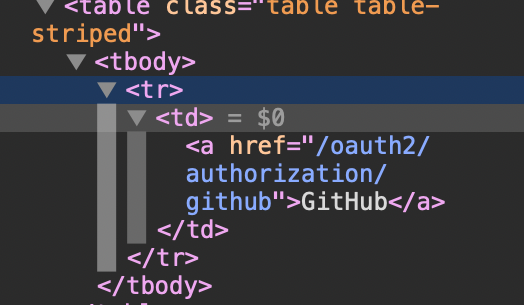
만약 클라이언트에서 github로그인을 호출하려면
"/oauth2/authorization/github"를 호출하면 된다.
해당 링크를 클릭하면 깃허브 로그인 창이 뜬다.
로그인 후에는 깃허브에서 지정한 callback URL로 이동한 것을 볼 수 있다.
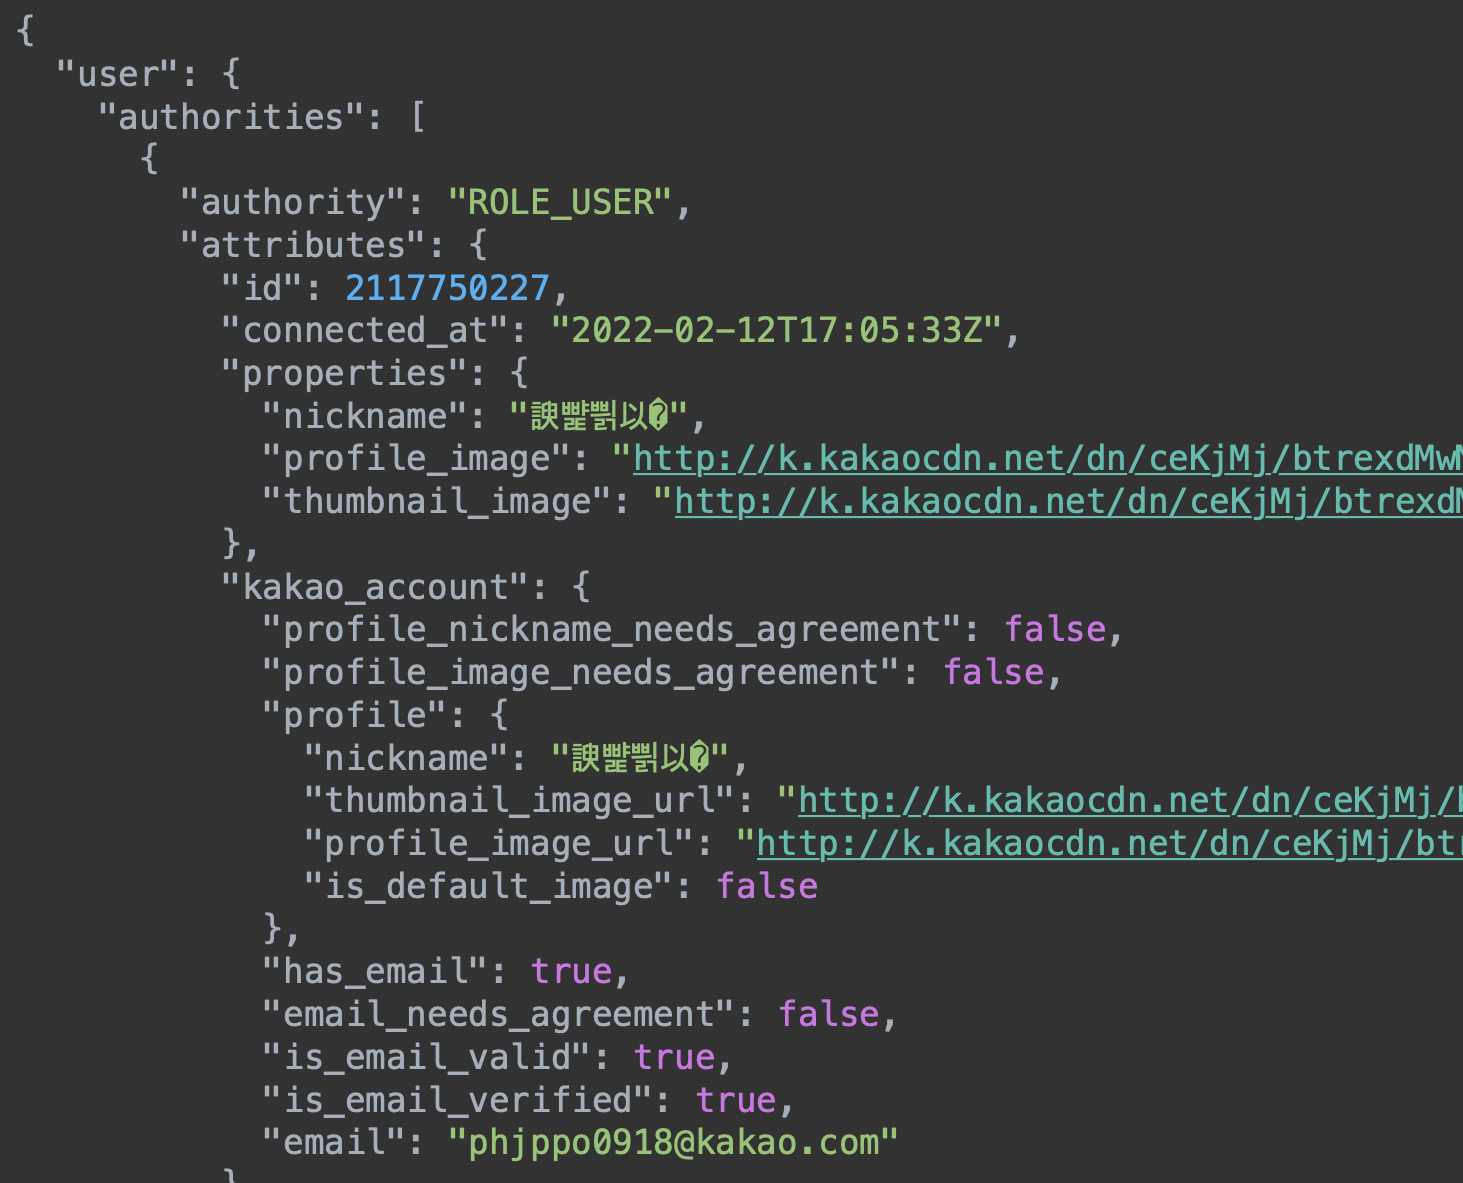
이제 localhost:8080/user을 요청해보자
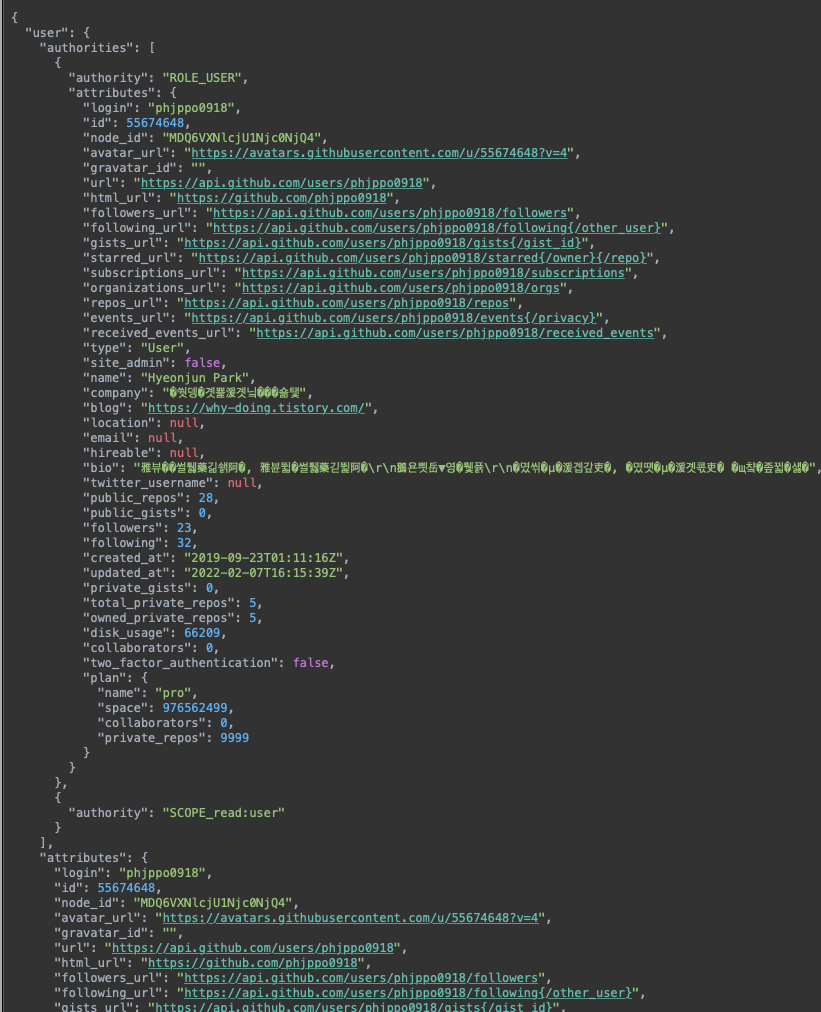
로그인 한 유저의 모든 정보를 가져올 수 있다.
localhost:8080/user/name을 요청하면

로그인중인 유저의 이름을 가져올 수 있다.
7. google login 설정
https://console.cloud.google.com/
Google Cloud Platform
하나의 계정으로 모든 Google 서비스를 Google Cloud Platform을 사용하려면 로그인하세요.
accounts.google.com
이 곳에서 새 프로젝트를 생성한다.
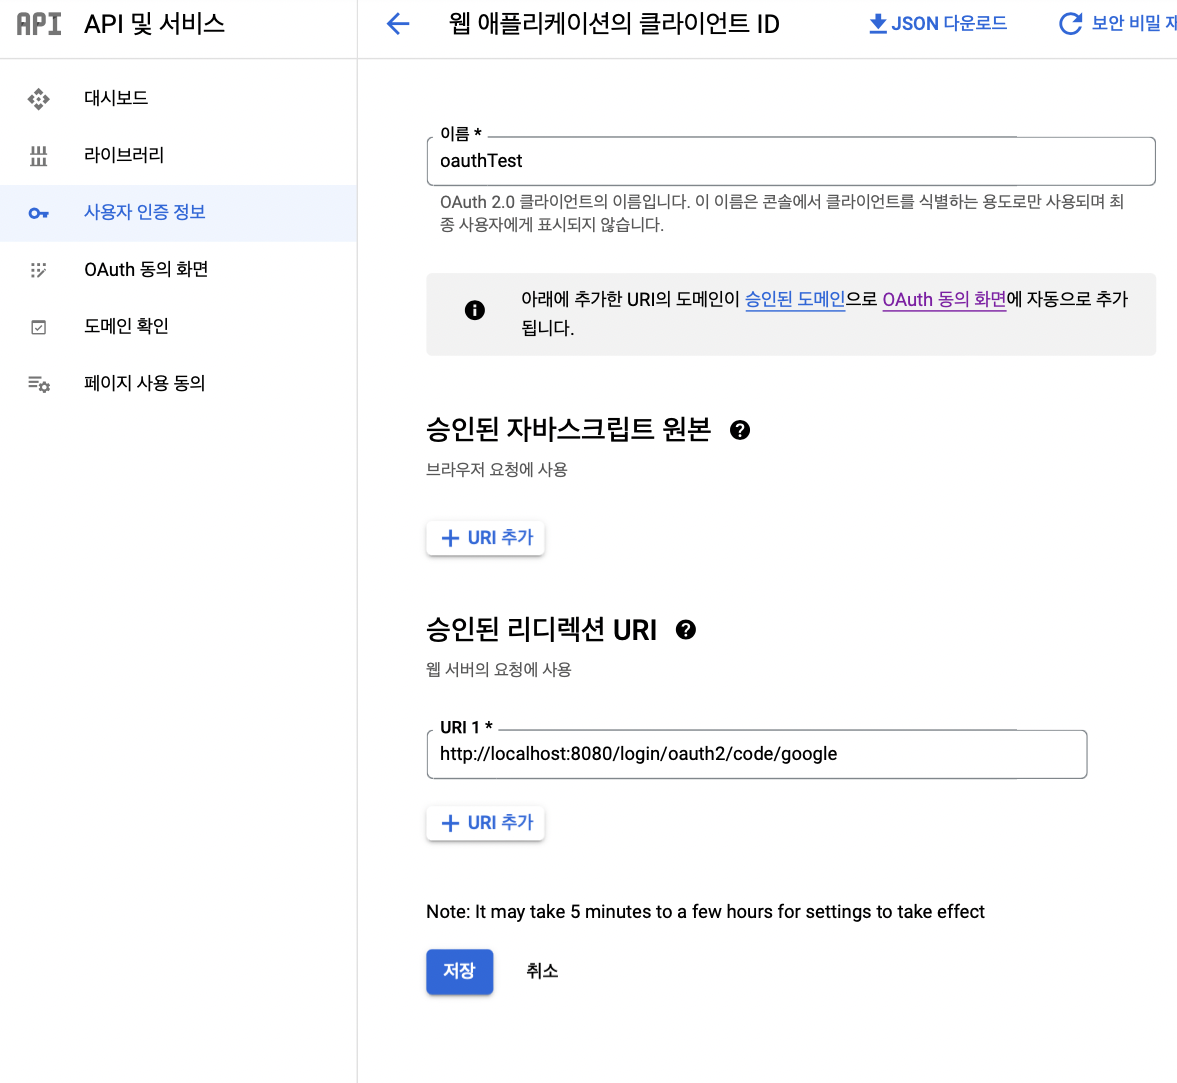
탐색메뉴 -> API 및 서비스 -> 사용자 인증 정보 -> +사용자 인증 정보 만들기 -> OAuth 클라이언트 ID 클릭

다음과 같이 입력
application.yml에 google 추가
spring:
  datasource:
    driver-class-name: com.mysql.cj.jdbc.Driver
    url: jdbc:mysql://localhost:3306/test?serverTimezone=Asia/Seoul
    username: root
    password: 1234
  security:
    oauth2:
      client:
        registration:
          github:
            clientId: 1q1q2q2q2q2q2q2q
            clientSecret: q3q33q33q3q3q3q3q3q3q3q3q3 #???? ??
          google:
            client-id: 1qsx3efcjiorj3.com
            client-secret: 243udsasdfjkl;jaflk;ajkldsrjkldsafjklasd
테스트
"localhost:8080/login" 요청 시

google 누르면 로그인 된다.
github와 마찬가지로 "/oauth2/authorization/google" 을 요청하면 구글 로그인 창으로 넘어가진다.
"localhost:8080/user" 요청 시

"localhost:8080/user/name" 요청 시

8. kakao login 설정
https://developers.kakao.com/console/app
카카오계정 로그인
여기를 눌러 링크를 확인하세요.
accounts.kakao.com
애플리케이션 추가하기

플렛폼 -> web 플렛폼 등록 -> 사이트 도메인 입력

카카오 로그인 -> 활성화 설정 ON -> Redirect URI에 "http://localhost:8080/login/oauth2/code/kakao" 입력

동의항목 설정
원하는 항목에 상태 설정

application.yml 설정
카카오는 스프링에서 지원이 안되기 때문에 Provider를 직접 입력해줘야 한다.
spring:
  datasource:
    driver-class-name: com.mysql.cj.jdbc.Driver
    url: jdbc:mysql://localhost:3306/test?serverTimezone=Asia/Seoul
    username: root
    password: 1234
  security:
    oauth2:
      client:
        registration:
          github:
            clientId: 1qw2w4e5e65r65rtr65r65t354eewr
            clientSecret: 1qw2w4e5e65r65rtr65r65t354eewr #???? ??
          google:
            client-id: 88761955634-1qw2w4e5e65r65rtr65r65t354eewr.apps.googleusercontent.com
            client-secret: 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wr-1TZy_fock1qw2w4e5e65r65rtr65r65t354eewrNlVy7
          kakao:
            client-id: 1qw2w4e5e65r65rtr65r65t354eewr
            client-name: Kakao
            redirect-uri: "{baseUrl}/{action}/oauth2/code/{registrationId}"
            client-authentication-method: POST
            authorization-grant-type: authorization_code
            scope: profile_nickname, profile_image, account_email
        provider:
          kakao:
            authorization_uri: https://kauth.kakao.com/oauth/authorize
            token_uri: https://kauth.kakao.com/oauth/token
            user-info-uri: https://kapi.kakao.com/v2/user/me
            user_name_attribute: id
테스트
lcoalhost:8080/login
localhost:8080/user
9. naver login 설정
https://developers.naver.com/apps/#/register?api=nvlogin
애플리케이션 - NAVER Developers
developers.naver.com
application 등록

application.yml 설정
spring:
  datasource:
    driver-class-name: com.mysql.cj.jdbc.Driver
    url: jdbc:mysql://localhost:3306/test?serverTimezone=Asia/Seoul
    username: root
    password: 1234
  security:
    oauth2:
      client:
        registration:
          github:
            clientId: 1q2w3e4r5t6y7u
            clientSecret: 1q2w3e4r5t6y7u #???? ??
          google:
            client-id: 88761955634-1q2w3e4r5t6y7u.apps.googleusercontent.com
            client-secret: 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u
          kakao:
            client-id: 1q2w3e4r5t6y7u
            client-name: Kakao
            redirect-uri: "{baseUrl}/{action}/oauth2/code/{registrationId}"
            client-authentication-method: POST
            authorization-grant-type: authorization_code
            scope: profile_nickname, profile_image, account_email
          naver:
            client-id: 1q2w3e4r5t6y7u
            client-secret: 1q2w3e4r5t6y7u
            client-name: Naver
            redirect-uri: "{baseUrl}/{action}/oauth2/code/{registrationId}"
            authorization-grant-type: authorization_code
            scope: name, email, nickname, gender, age, birthday, profile_image, birthyear, mobile

        provider:
          kakao:
            authorization_uri: https://kauth.kakao.com/oauth/authorize
            token_uri: https://kauth.kakao.com/oauth/token
            user-info-uri: https://kapi.kakao.com/v2/user/me
            user_name_attribute: id
          naver:
            authorization_uri: https://nid.naver.com/oauth2.0/authorize
            token_uri: https://nid.naver.com/oauth2.0/token
            user-info-uri: https://openapi.naver.com/v1/nid/me
            user_name_attribute: response
테스트
localhost:8080/login

localhost:8080/user

참고
https://spring.io/guides/tutorials/spring-boot-oauth2/
Spring Boot and OAuth2
this tutorial is designed to be completed in 2-3 hours, it provides deeper, in-context explorations of enterprise application development topics, leaving you ready to implement real-world solutions.
spring.io
HttpSecurity (spring-security-docs 5.6.1 API)
Allows specifying which HttpServletRequest instances this HttpSecurity will be invoked on. This method allows for easily invoking the HttpSecurity for multiple different RequestMatcher instances. If only a single RequestMatcher is necessary consider using
docs.spring.io
https://brownbears.tistory.com/251
CSRF란?
CSRF란? 사이트 간 요청 위조(Cross-site Request Forgery) 웹 어플리케이션 취약점 중 하나로 사용자가 자신의 의지와 무관하게 공격자가 의도한 행동을 하여 특정 웹페이지를 보안에 취약하게 한다거나
brownbears.tistory.com
'Spring' 카테고리의 다른 글
| io.awspring 라이브러리를 활용한 Spring-Amazon S3 연동 (0) | 2023.09.06 |
|---|---|
| spring 환경에서 redis pub-sub을 이용한 멀티 캐스팅 (0) | 2023.07.15 |
| JWT, 그리고 OAuth (0) | 2022.02.11 |
| Intellij 에서 Spring MVC 프로젝트(Gradle) 생성 (0) | 2022.01.28 |